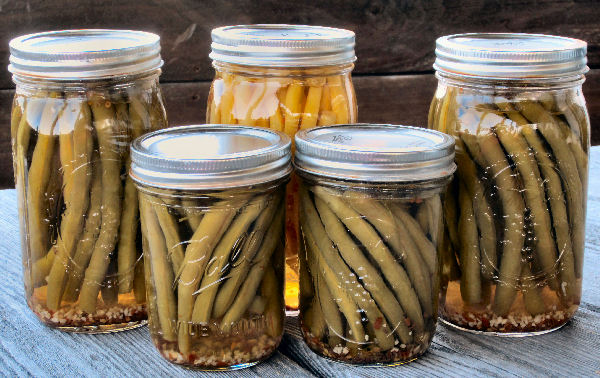
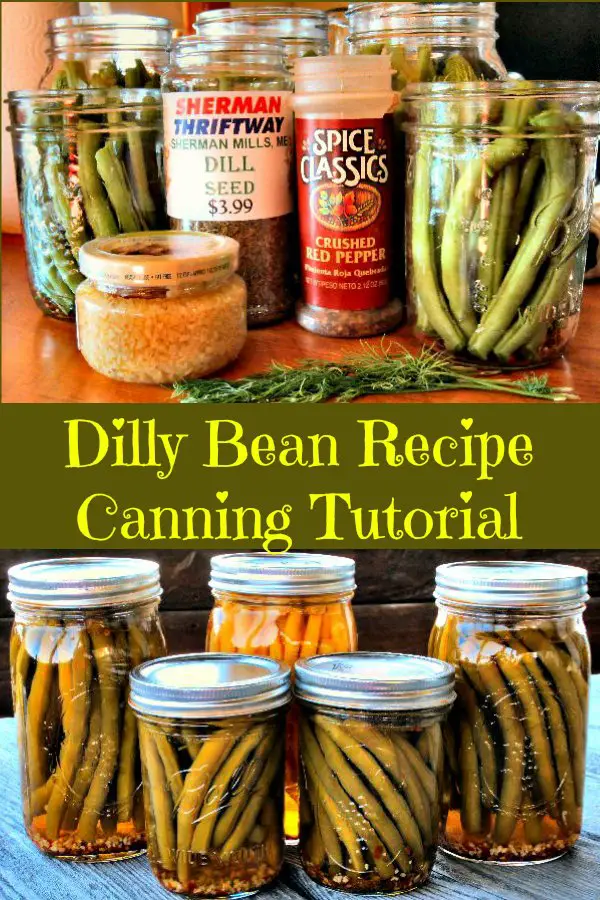
Canning Green Beans to make Dilly Beans - A Water Bath Canning Tutorial
Water Bath Canning isn't difficult and making this Dilly Bean Recipe is great way to use up all those green beans from the garden and learn the skill of water bath canning. This time of year it’s a race to use up the veggies that my “bursting at the seams” garden produces. There’s a limit to how much the family can eat of any one vegetable variety and still be able to use the word “variety”. Mention the word zucchini and the family turns the color of one. It's the same thing with the wax beans and green beans so I spent this weekend cleaning up the” bean scene” in the garden with a marathon canning session.

I spent Saturday getting “pickled” by making my green beans into Dilly Beans, a favorite green bean recipe for my family. For those of you who haven’t canned, I am doing this post as a “water bath canning 101” canning tutorial. Don’t be afraid to try canning. I was intimidated by the canning process the first time I tried to can tomatoes. Making sure I didn't make any mistakes that could make someone sick was my major concern.
Two Types of Canning - Water Bath and Pressure Canning
If you are new to canning, there are two types of canning – water bath and pressure canning. Water bath canning is the method you use to preserve high acid foods like tomatoes and tomato sauces, pickles and pickled relishes, jams, jellies, and preserved fruit. Pressure canning is the method that you use to preserve your low acid foods like plain vegetables, potatoes, soups, meats, and anything else that does not have acid in the produce or the ingredients. For dilly beans, we will be using the water bath method because it is an acidic, pickled end product.
Preparation for Water Bath Canning of our Dilly Bean Recipe
Whatever method you use, cleanliness is next to godliness when you are canning. I wash all the surfaces (countertops, cutting boards, etc.) that I am using with a disinfecting bleach solution. I also wash all the utensils I will be using along with my canning jars in the dishwasher.
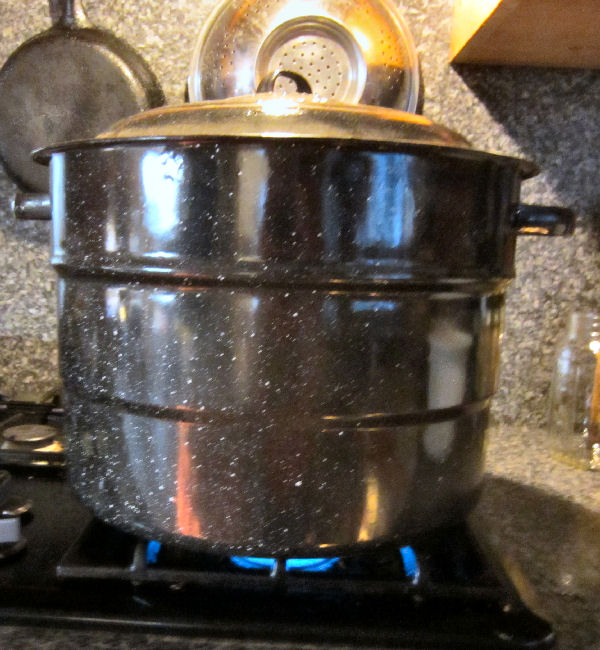
I use an old black-speckled canning kettle like my Grandma did. The technology has not changed over the years for the water bath canning process. I’ve had the same canning kettle for over 35 years. That canning kettle has had a lot of canning jars put through it in that time! You can still buy the same type of kettle at Wal-Mart or online at Amazon. Be sure you use real canning jars and don’t try to save money by using old mayonnaise or baby food jars. These are OK when you making refrigerator pickles or jam but when you are doing water bath canning you need real canning jars that are in good condition with no knicks on the rim or cracks in the jar body. You can be economical and pick up used canning jars at yard sales. Just carefully examine them for any defects. Don’t use any that have even the slightest flaws. You can reuse the screw down band as long as they aren’t rusty but you cannot reuse the actual lids. they are a single use, throw away item and the one place you should be thinking safety and not saving a few pennies. Another handy tool to have for canning is a jar lifter. You’ll find those where they sell canning supplies.
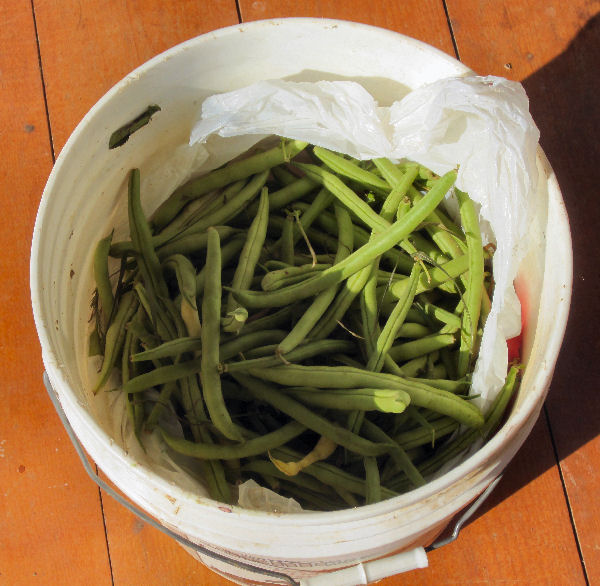
A bucket of green beans fresh from the garden, ready to can!
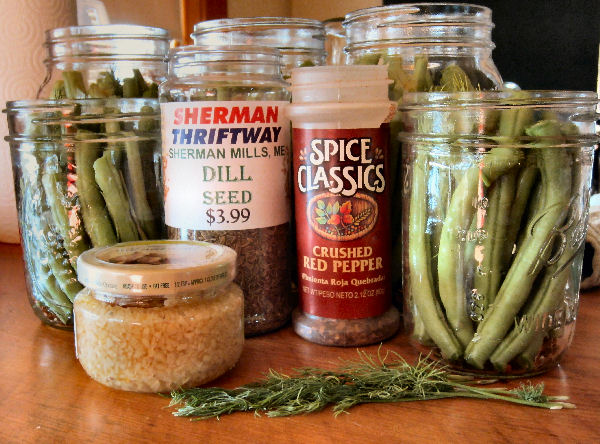
You will need the following ingredients to fill 7 pint jars of dilly beans – double everything if you are filling quart jars.
- 4-5 pounds green and/or yellow wax beans
- 1 ¾ teaspoons crushed dried hot red pepper
- 1 ¾ teaspoons dried dill seed
- 7 clusters of fresh dill flower heads
- 3 ½ teaspoons minced garlic in olive oil
- 2 ½ cups cider vinegar (ensure 5% acidity)
- 5 cups water
- 5 tablespoons pickling salt
Wash your canning jars with hot, soapy water or in a dishwasher; rinse well and put them upside down on a clean dishtowel. I wash the lids, bands in hot soapy water, rinse them thoroughly, and then put them in a pan of water on the stove and bring them to a boil to sterilize them. I leave them in the water until I am ready to use them.
I sort my beans choosing ones that are the right length for the size canning jar I am using and I only use the beans that are in peak condition. I put aside beans that are blemished or past their prime. When you can, you only want to use premium quality produce.
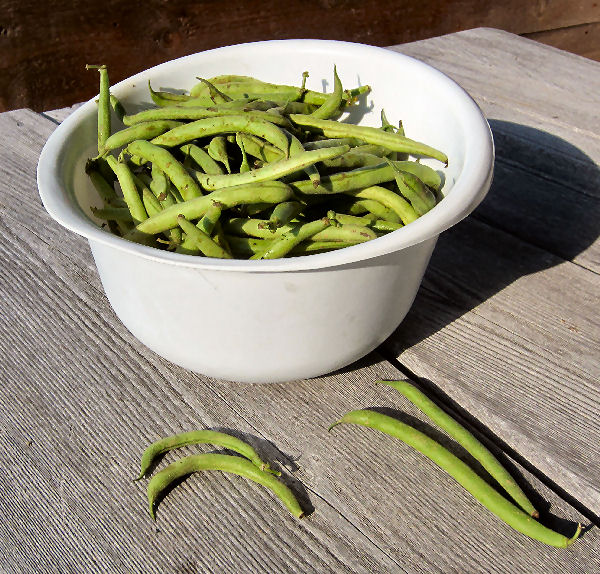
Sort your green beans choosing nice straight beans the right length for the canning jar you will use.[/caption]
I wash the beans under cold running water in my colander making sure that I get rid of all dirt and bugs
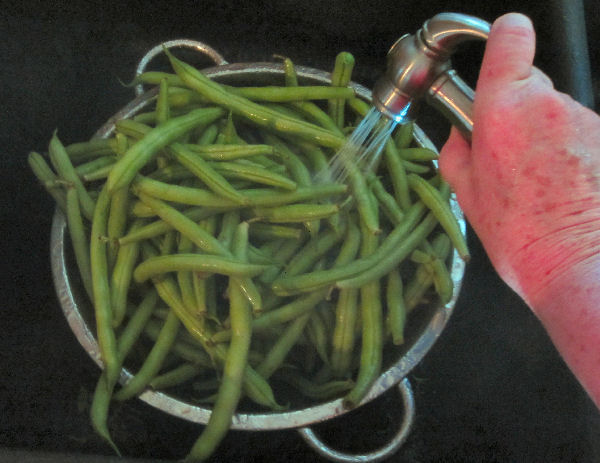
I wash the green beans thoroughly. Cleanliness is very important in all stages of canning by the water bath method.
Next I remove the tips of the beans on both ends. I use clean scissors to do this, and if necessary, I trim the beans so they will fit upright in the canning jars. It may be overkill but I wash the beans a second time in the cold running water.
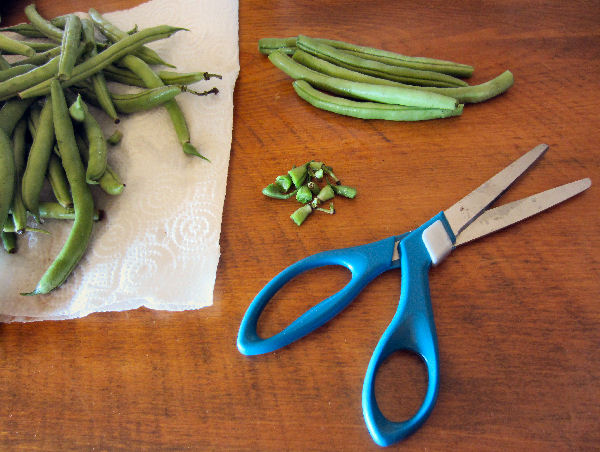
I use scissors to cut my green beans for canning. Its quick and fast!
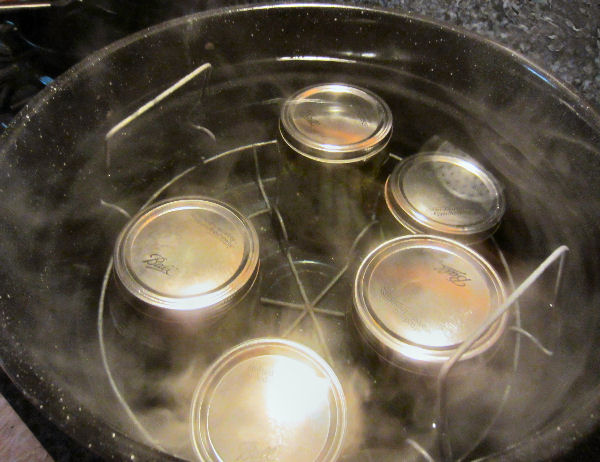
Fill your canning kettle with enough water to cover the top of the canning jars resting on the wire rack by about 2 inches. As this amount of water takes a while to heat, I start heating it while I pack my jars. Bring the water to a boil.
The Dilly Bean Water Bath Canning Process
While the water in the canning kettle is heating, I work on the next step which is to put the following ingredients in each jar –
½ tsp. of minced garlic
¼ tsp. of dill seed
¼ tsp. of crushed red pepper flakes
1 cluster of fresh dill weed from my garden ( if you don’t have fresh dill just double the amount of dill seed.)
Now I pack the beans into the jar as tightly but neatly as possible.
In a pan on the stove, I create my pickling brine by combining 2 ½ cups of 5% acidity vinegar, 5 cups of water, and 5 tbs. of canning salt and bring it to a boil, stirring to dissolve the salt. Be sure to use canning salt and not table salt. Table salt has additives and will make the liquid in your jars cloudy looking. I then pour the hot brine over the beans, leaving ½ inch of headspace at the top of the jar.
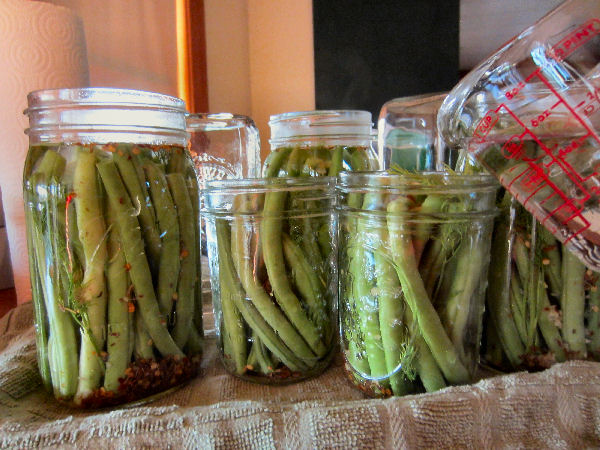
Pour in the hot brine solution into each jar leaving a½ inch of head space.
Next, take a knife, slim rubber scraper, or thin canning spatula and run it around the inside of the jar to get rid of any air bubbles. Sometimes you will have to add a little more brine after doing this.
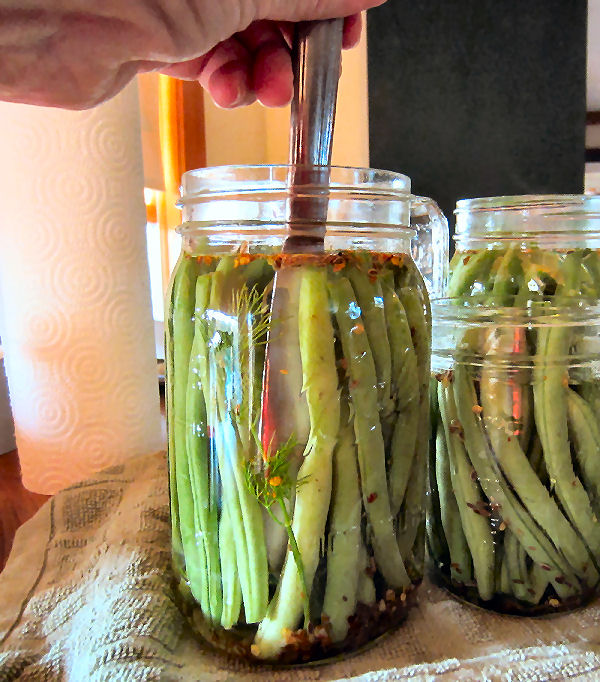
Move the knife through the jar to release any air pockets that may have formed
Then wipe the jar rim with a clean cloth or paper towel to remove any debris to insure that you get a nice tight seal when placing the lid on your jar.
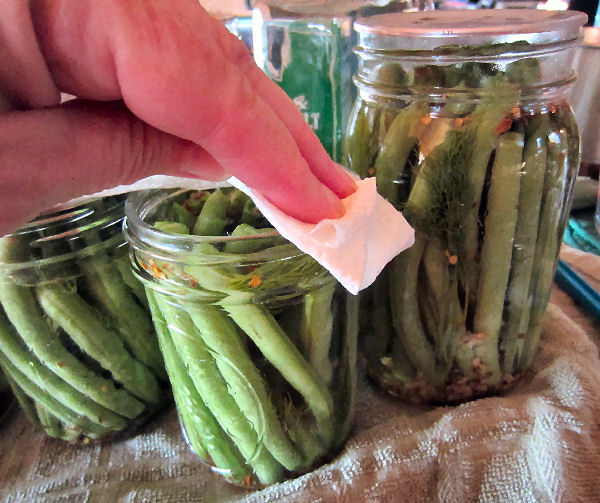
Wipe the rim of the canning jar clean before putting the lid on.[/caption]
Top the jar with a new sterilized lid and screw on the metal band to hand tight. Do not over tighten. Most canning jars sold today use a two piece self-sealing lid which consists of a flat metal disc with a rubber-type sealing compound around the side near the outer edge, and a separate screw-type metal band. The flat lid may only be used once but the screw band can be used over as long as it is clean and doesn’t rust.
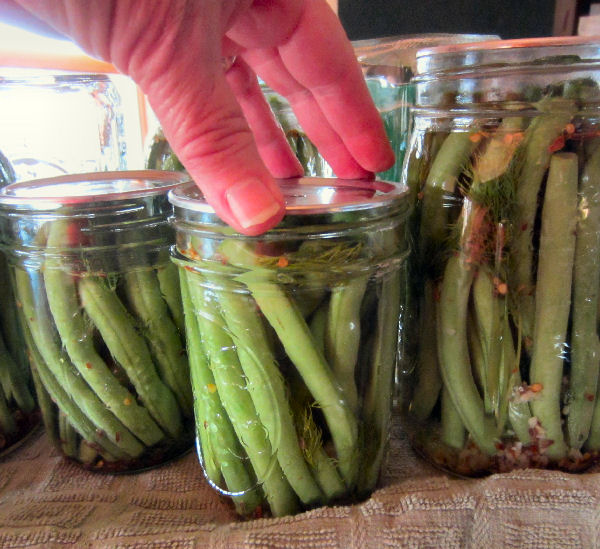
Set the canning jar lid on the clean rim.
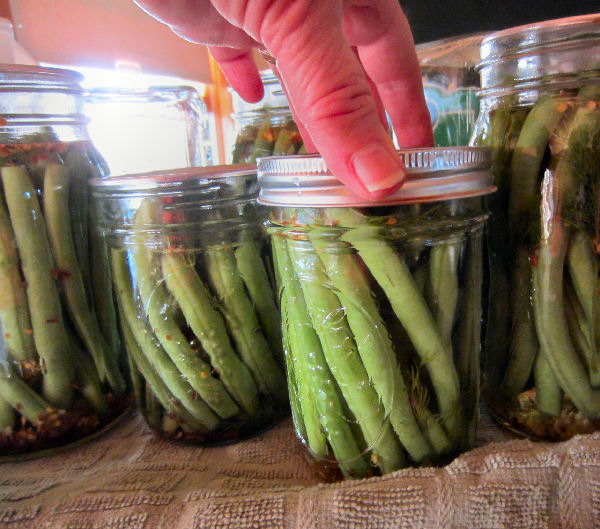
Hand tighten the band onto the canning jar but do not over tighten.
The dilly beans are ready for their bath.
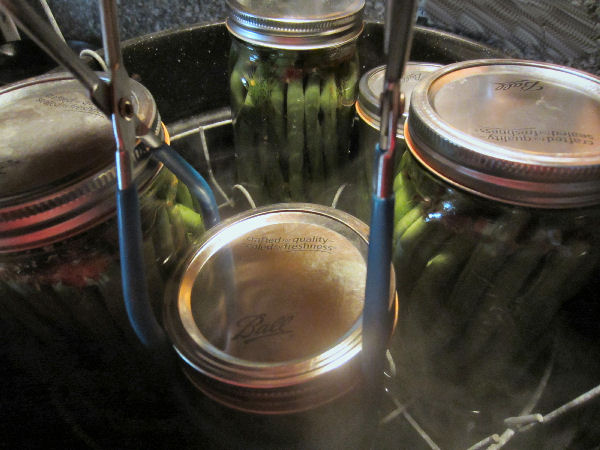
Using a “jar lifter” place them in the hot water in the canner while the brine in the jars is still hot.
Already to go for their "bath"........15 minutes in boiling water!
“Process” the filled jars in the boiling water canner for 15 minutes, but you may have to adjust this timing dependent on where you live. Start your timing from the moment the water starts to boil after you put the jars in. Check your altitude (feet above sea level) adjusting timing for altitude by the table below.
Altitude Adjustments for Boiling Water Bath Canner
1001-3000 ft.- add 5minutes
3001-6000 ft.- add 10 minutes
6001-8000ft. -add 15 minutes
8001-10,000ft.- add 20 minutes
When the specified time is up, remove the jars using a jar lifter and let them cool to room temperature.
A "jar lifter" is a handy tool to have to remove the hot jars from the hot water. In fact, it really is necessary equipment.
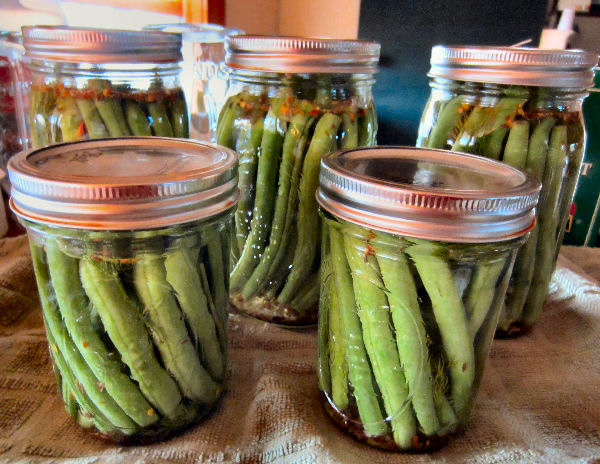
Canning Process is done - now its just the waiting!
Check lids for seal after 24 hours. You will hear a popping sound in the kitchen as each jar cools and the lid is pulled down tight as the air in the jar contracts. The lid should not flex up and down when center is pressed. The beans will need to sit for 4-6 weeks to get fully flavored. Never use a jar of canned food where the lid has “popped up”. That means there is some bacteria spoiling the food and gas is raising the lid center. Do not eat it!
Remember DON'T cut corners, or take shortcuts, or skip steps! Home canning is doable and safe if you “keep it clean” and follow all the directions. Printable Dilly Bean Recipe below .
Best Easy Dilly Bean Recipe

A delicious and easy to follow recipe Dilly Bean recipe makes a zesty pickled green bean that is a great condiment and delicious on a salad.
- Prep Time: 20 mins
- Cook Time: 15 mins
- Total Time: 35 mins
- Yield: 7 pint jars 1x
- Category: Pickle Canning Recipes
- Cuisine: American
Ingredients
- •4-5 pounds green and/or yellow wax beans, washed and trimmed to proper jar size
- •1 ¾ teaspoons crushed dried hot red pepper
- •1 ¾ teaspoons dried dill seed
- •7 clusters of fresh dill flower heads
- •3 ½ teaspoons minced garlic in olive oil
- •2 ½ cups cider vinegar (ensure 5% acidity)
- •5 cups water
- •5 tablespoons pickling salt
Instructions
- Put the following ingredients into each clean jar –½ tsp. of minced garlic, ¼ tsp. of dill seed, ¼ tsp. of crushed red pepper flakes, and 1 cluster of fresh dill weed from my garden ( if you don’t have fresh dill just double the amount of dill seed.)
- Pack the beans into the jar as tightly but neatly as I can.
- In a pan on the stove I combine 2 ½ cups of 5% acidity vinegar, 5 cups of water, and 5 tbs.canning salt and bring it to a boil, stirring to dissolve the canning salt. (Be sure too use canning salt)
- Pour the hot brine over the beans, leaving ½ inch of headspace at the top of the jar.
- Take a knife, slim rubber scraper, or spatula and run it around the inside of the jar to get rid of any air bubbles. You may have to add a little more brine after doing this.
- Wipe the jar rim with a clean cloth or paper towel to remove any debris to get a nice tight seal on each jar.Top with a new sterilized lid and screw on the metal band to hand tight. Do not over tighten.
- “Process” the filled jars in the boiling water canner for 15 minutes, but you may have to adjust this timing dependent on where you live. (See chart in tutorial) Start your timing from the moment the water starts to boil after you put the jars in.
- Remove jars when cooking time is done. Let jars cool. You will hear a popping sound in the kitchen as each jar cools and the lid is pulled down tight as the air in the jar contracts. Check lids for seal after 24 hours. The lid should not flex up and down when center is pressed. The beans will need to sit for 4-6 weeks to get fully flavored. Never use a jar of food where the lid has “popped up”.


Daria says
I made a case of beans today but only heard 1 ping. I pressed on the lids and they are all down no bubble or give. I've made these in the past and always heard pings. Are these still good? Should I have heard 12 pings?
I look forward to your response.
Thanks in advance,
Sheryl Thompson says
If the lids are down and solid, I would think that they are OK but you might want to mark on the lids to distinguish this batch so you can keep an eye on it. You can tap on the lid with a teaspoon and it should have a clear ringing sound if the jar has sealed properly. Before using check to be sure that the lids are still down and also check for signs of mold. When you open a jar, smell to be sure that there is no foul odor. Take a small taste to see if there is no strange flavor. If botulism is present in home canned food there will be a very bad odor and the lids will bulge.
Ariel says
Wondering how long I can store these dilly beans for
Sheryl Thompson says
The USDA has a hard and fast rule that all canned goods have a shelf life of one year. I try to use up all my canned goods up in that time frame but I am also very frugal and hate wasting food. I have used canned goods that are a couple of months beyond the limit with no problems but always be careful and check for these 3 things. Always make sure that the lid has not popped up or is leaking. Make sure that the product still smells good and check visibly for any sign of mold. And when in doubt, THROW IT OUT!
Jan says
We made dilly beans yesterday and discovered we forgot to put dill in the first batch until after they were processed., What options do we have to add dill?
Can we reprocess them and if so, how many minutes?
Sheryl Thompson says
Sorry for the delay in answering you but I have been ill. All better now and back online! Be sure to get the Covid vaccine. It saved my life! As for your dilly beans.... Reprocessing would most likely overcook them and probably make the beans mushy. I would just leave as they are. They will still be "pickled" by the vinegar and spicy from the other ingredients.
Linda says
Pinned. I love green beans. Yummy.
Sheryl T says
This recipe comes out really good. My husband loves them and insists I make enough to last the year every summer! Be sure to try them.
Tiffany says
We're hoping to put in a garden next year, so I'm hoping we can do a little canning! Thanks for sharing with us at the Merry Monday Link Party! Hope you're having a wonderful week!
Sheryl T says
You'll enjoy canning. There is a feeling of satisfaction when you have a cupboard filled withjars of preserved food you did yourself.
Stephanie says
These look perfect!! Thank you so much for linking up at Tasty Tuesday! Your recipe has been pinned to the Tasty Tuesday Pinterest board! Please join us again this week!
Jess says
These do sound like a great way to use beans!
Thanks for joining the Link Up this week!
Carie Spence says
I'm so glad you have all these tutorials on here, I so needed them! Thank you for linking up to the Bloggers Brags Pinterest Party. I have pinned your post to the Bloggers Brags Pinterest board.
Carrie says
These look so pretty! I've never done anything like this before. I wish I had a garden.
Pinned, and thanks for linking up at Wordy Wednesday!
Jill says
Thanks for this info. I have always wanted to can, but have no idea where to begin! This was very helpful to me!
Thank you for stopping by the Thoughtful Spot Weekly Blog Hop this week. We hope to see you drop by our neck of the woods next week!
Laura@Baking in Pyjamas says
Great way to put these vegetables to use. Thanks for linking up to Sweet and Savoury Sunday, stop by and link up again. Have a great day!!
Ginnie says
I love pickled green beans ... may have to try this:) Thanks for the step by step directions!
Tina says
My husband loves dill green beans, I will have to keep this in mind if I ever have the motivation to try canning. It's such a great idea though since it looks like you got a lot of green beans!
Sheryl T says
That's it! When your garden comes in and its time t0 harvest its impossible to eat everything before it goes bad. Freezing and canning are ways you can preserve the harvest. Freezer space is finite and it costs money to run a freezer so I save freezer space for meats. Canning is by far more economical in the long run. There is the initial investment in the equipment and the use of some energy resources but as long as you have somewhere to store your can goods (I put my excess on shelves in my cellar) it is a great savings and well worth the effort.
Lynn H says
What a wonderful and informative post!! I love dilly beans and have wanted to make them for some time now! Your recipe is great and I think I will give it a try~ Lynn @ Turnips 2 Tangerines
Mary@Back to the Basics! says
I love dilly beans!!! YOU have been featured this morning for Tuesdays with a Twist at Back to the Basics! Thank you for sharing your tutorial.
Come on over and share what you're latest posts.
http://back2basichealth.blogspot.com/2013/08/tuesdays-with-twist-21.html
Jamie @ Love Bakes Good Cakes says
Thanks so much for linking up to All My Bloggy Friends last week - I hope you'll join us again tomorrow. I look forward to seeing what you've been working on this week! 🙂
Cynthia L. says
Fantastic Step by step instructions! I happen to have some beans that I need to do something with - I will give this a try! Thanks for linking to the In and Out of the Kitchen party! I am pinning this!
Sheryl T says
Water bath canning is easy and very frugal if you have a garden. A great way to save money and also have the piece of mind of knowing the source of your food. With all the scary recalls and produce coming from foreign sources, I like having more control of what goes on my table.
Vicki @ Grams Made It says
I've never had dilly beans. They sound great!
Sheryl T says
They are delicious, and a great way to get kids to eat green beans. They like them because they taste like pickles. After, they seem more willing to eat them as regular veggies.
Melanie says
These sound great! I remember my grandma canning every summer when I was a kid. I'm stopping by from Manic Monday link up. Have a nice week!
Melanie
Fort Western says
Thanks for sharing! I love making refrigerator pickles, but haven't taken the dive into canning just yet. Maybe next season will be the time.
Sheryl T says
You should give it a try! It's not that difficult and the investment in the begining equipment is minimal. The anount of savings you will recoup and the high quality of your product will be well worth it! If you ever need any advice, just drop me a line!
Adelita says
I remember making these every fall as a kid! I loved how crisp they were and how wonderful they tasted. Wow, so great to see these here in cyberspace!!! Thanks 🙂
Sheryl T says
You'll find that I'm all about old school comfort food and forgotten recipes! Food is always attached to special memories - family, holidays, childhood! Special times and special recipes - I love them! Thanks for stopping by!
Michele B says
Great post and the pictures are very clear! Nice recipe too. I will have to give this a try. My Mama and Granny always canned greenbeans with a vinegar base but they did not add the spices. I miss hers. The only time I get to enjoy them is when I visit. My family will not eat them that way. Your combo sounds interesting. I think I might have to experiment a bit. New follower here from Make My Morning BH.
Michele @ http://lovejoyjunction.blogspot.com/
Sheryl T says
You can easily adjust the spices to make them suit your family's taste buds. The process remains the same , just adjust the spices.
Lisa @ Two Bears Farm says
Great tutorial - I love dilly beans! I've never made them though.
Sheryl T says
Well, now you have to try! They do taste really good! Bill keeps asking, "When will they be ready?" Six weeks seems forever for him! He's worse than having little kids!
Kelsey says
Wow this is so great! I might have to try this just to see if I can can these! I have been struggling trying to find some recipes but this one looks easy enough for me to do!
Sheryl T says
It is very easy and that's why I chose that recipe for the tutorial.....very simple with great results!
Mackenzie says
I love it! Thank you so much for posting on Saturday Show and Tell. I hope you'll be back this week to link up some more great ideas! Have a great rest of the week!
-Mackenzie
http://www.cheeriosandlattes.com
Sheryl T says
I'm glad you enjoyed it and yes, I'll be back this Saturday for "Show and Tell".
Kathleen says
They look so delicious and pretty too. My mom does all her own canning as well and I always want to bring home some of the jars of beans to decorate with LOL. Stopping by from MBC.
http://www.lifewith4boys.com
Jody says
Thank you so much for sharing your canning tutorial on Simple & Sweet Fridays. You're inspiring everyone to start canning. Have a wonderful week!
Jody
Sheryl T says
And as Martha would say, "That's a good thing!."
K @ Claiming Our Space says
I think the "pop" of a properly processed jar is such a great sound. Thanks for sharing on Tout It Tuesday. Hope to see you tomorrow!
Sheryl T says
I have to agree. Its music to a canner's ears!
Lisa Cash Hanson says
Will you ship those to my house? LOL I will never be able to do that but I'm so thankful to have others that make amazing things that I can just buy :)) These look really good thanks for sharing!
Sheryl T says
Now don't be so negative. Anyone can can LOL!
Frugal Foodie in WV says
I love canning! Your pictures are great and the step-by-step is really easy to follow. I have canned everything, but green beans this year 🙂 Last year I canned a bunch, but I didn't grow any this year. I saw your post on bloggy moms and following your rss feed now. I look forward to your future posts!
Sheryl T says
Thank you for your kind compliments! I appreciate them! I have to agree that canning is fun and not difficult at all. And it is a shame to not be able to use all the food that you grow in your garden, but sometimes you can be too successful in gardening. Sure, you can give it away but canning preserves it for use later and supplements the food budget nicely. With the economy in the condition it is, we need to go back to the "victory" garden mentality.
KarenLynn@Lil'SuburbanHomestead says
Oh my goodness if my husband saw these he would just want to move right in with ya'll! He loves loves loves dilly beans! Beautiful pics, beautiful product. Thanks for sharing and thanks for linking up to "The Ole' Saturday Homesteading Trading Post" monthly blog hop!
Sheryl T says
Thank you for the kind words and our hubbies have the same taste in beans LOL!
Alina says
This is an interesting snack!Living at down under, we are geitntg our warmer days soon and our family's latest obsession is homemade low fat ice cream! My son love eating ham and turkey...we will eat this with ham too!
Ewa says
I love beans, maybe one day I will try to make some jars as well 🙂
I am starting a new Craft/DIY/Recipe link party on Tuesday and your recipe would be perfect for it, I would love to see it there 🙂
Miz Helen says
I am so excited that we still have some Green Beans so I can try this awesome recipe. Your tutorial is excellent! Hope you have a fabulous holiday weekend and thank you so much for sharing with Full Plate Thursday.
Come Back Soon!
Miz Helen
Nancy says
Now I really want to try these. I love green beans and dill. Thanks for sharing at Rural Thursdays this week. 🙂
Sheryl T says
They are really good a great way to use up green beans when the plants are producing so many, it starts to get away from you!
Megan says
My husband will love this! He has been trying to do more canning for so long but he never gets it right! Thanks
I am a new follower from the blog hop till you drop! If you get a chance check out my blog please!
Megan
http://nicholsfam.blogspot.com/
Sheryl T says
Canning isn't difficult but you can't rush it or skip any steps, so tell him to keep trying!
MG Atwood says
Oh how I love dilly beans! My sweet mother in law used to make the best dilly beans. Canning is becoming a lost art. I'm guilty of putting my canner in the attic, but I think I should bring it out and pass on the knowledge to my daughter and daughter in law. thanks for sharing. Joining you from rural Journal.
Sheryl T says
You are so right! It is becoming a lost art but with the economics of the times, I am seeing a resurgence in interest as people are planting gardens to help with their tight family budgets and the rising cost of food. Once they start gardening, they start to think about not wasting the veggies they have put so much effort into, and canning is the answer.
alissa apel says
I like how you show each step. I've never canned before. It makes me nervous for some very odd reason.
http://theapels.blogspot.com/2012/08/three-books-ill-never-throw-away.html
Sheryl T says
Don't be intimidated! A lot of people are afraid of bacteria and the possibility of botulism, but as long as you keep things clean, process your food by the correct method (water bath or pressure) and adjust times for altitude variances you will be OK. People have been canning for a long time, long before there were super markets! LOL Give it a try...start with something that is hard to mess up like canning fruit jams or tomatoes. Good luck!
Lisa @ Two Bears Farm says
Great tutorial - I love dilly beans but have never tried to make them.
Sheryl T says
Well, I hope you give it a try!
Susie Earning-My-Cape says
GREAT tutorial!
Thanks for sharing with my Super Link Party! 🙂
Sheryl T says
Thanks! Canning is something that a lot of people would like to try but they are a little nervous about. Water Bath Canning is a great way to "get your feet wet" and give it a try. The equipment that you need isn't all that expensive.
Joyness Sparkles says
Thank you so much for this! I have heard of Dilly Beans, but never ate them and have wanted to try them. I look forward to giving this recipe a go! 🙂
Sheryl T says
My hubby, Bill, likes anything dilly with a little zip to it! Dilly Beans are one of his favorites!
Lisa Isabella Russo says
What a wonderful and clear post! The pictures are just great. Someday I'd like to plant some veggies, it looks like yours just flourishes!
Sheryl T says
It is a very satisfying feeling when you look at all the canned goods and realize that you took them from a packet of seeds all the way through to a very attractive and delicious end-product! I hope you give it a try!